Written by: Kruxion / Graphic by: Anna.Marie97
Introduction
Danger Pod is one of the Habbo classic luck-based games, quick and simple to set up as much as quick and simple to play. The game consists of lining up on the game room floor 6 to 8 seats, all of different colors, and a distinct tile or a furni players can step on in the game room separated from the seats, which if stepped on, will teleport to one of the lined up colored chairs. Before each round, players will agree on which coloured seat will be considered the “Danger Pod” and communicate it to the game host. Players will then step on the tile/furni chosen to teleport, and those who will be teleported to the chosen Danger Pod, are out of the game. Every round, a new Danger Pod is added up, increasing the amount of seats you lose for if you finish on, until the last player standing remains as the winner.
Difficulty Level
| Low | ✖️ | ✅ | Medium | ✖️ | ✖️ | Hard |
What you need
Triggers:
Furni Is Used (x2)

User Walks On Furni (x1)

User Clicks Furni (x1)

Conditions:
Furni Has Users (x1)
Group Member (x1)
Selectors:
Users On Furni (x2)

Add-Ons:
Unseen Effect (x1)
Effects:
Teleport To Furni (x3)

Match Furni To Position & State (x2)

Gaming Furni:
Floor Switch 1 (x2)
Pressure Plate
Furni:
– 6 to 8 different coloured chairs (alternatively, if you use all same coloured chairs, you can mark them by placing number blocks behind them)
– Invisible blocks (x33 if 6 seats, x43 if 8 seats) *
– Invisible furni selector (x1) **
– Any gate that you can open and close
* Optional (can be replaced by other furni, see Step 5 at the bottom).
** Not needed if invisible blocks are not present.
Game area Set Up
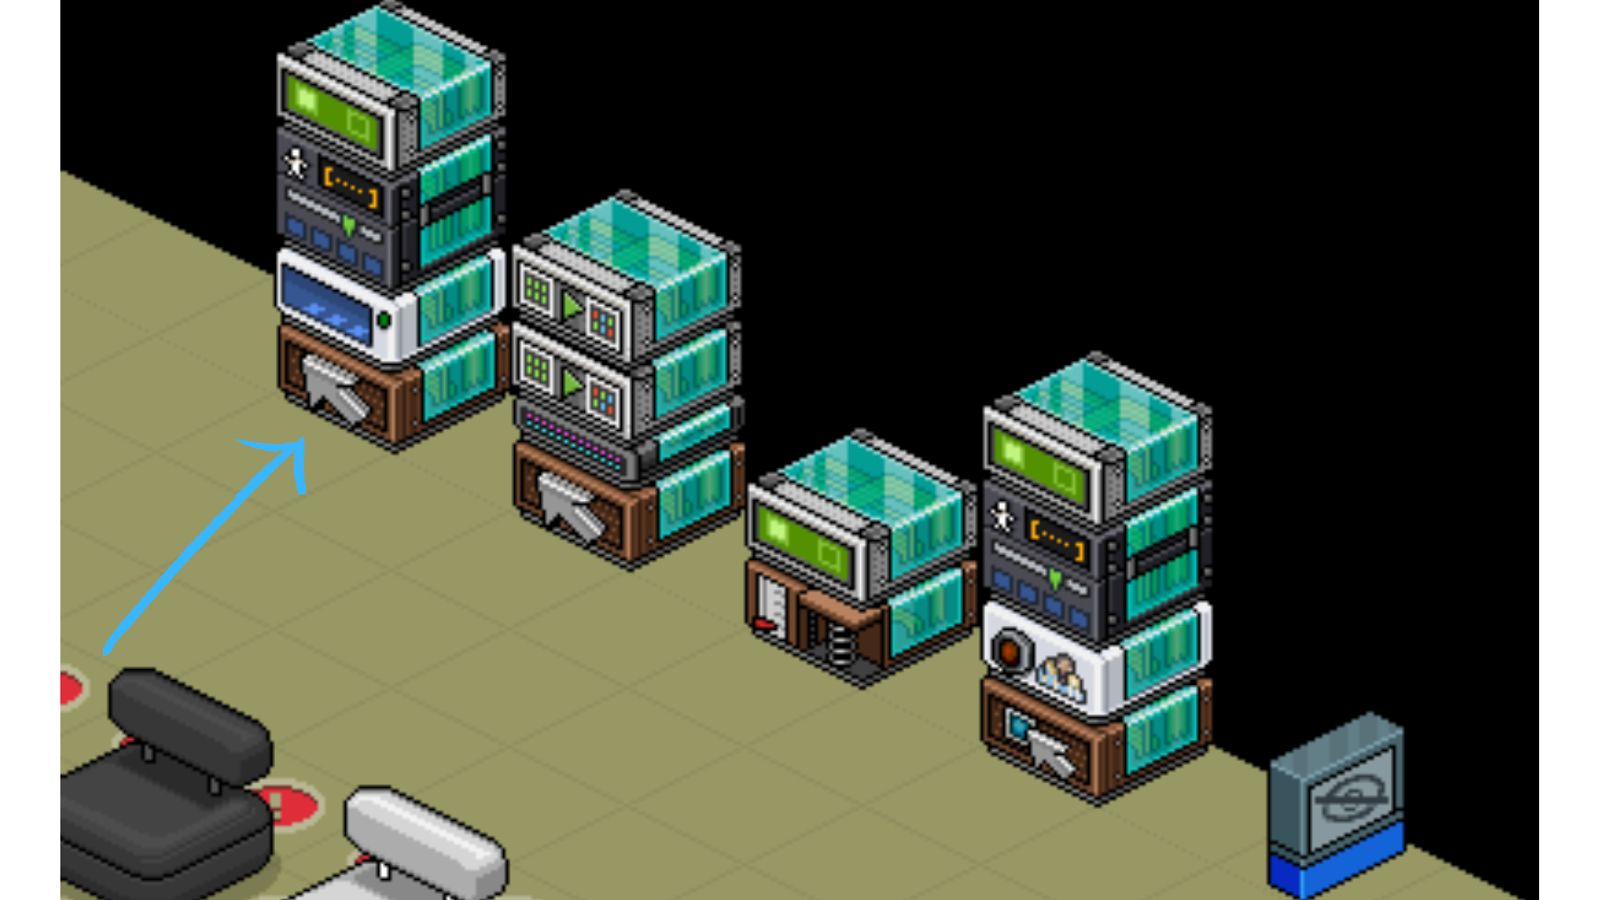
For this set-up, you will utilize a mix of the classic wired and the newly released Wired batches for easier game management and automation. I have made a simple system that if correctly set up, makes the game very tidy and organized, other than easier to manage when compared to the past. Note, I have utilized 6 chairs, but with 8 chairs the process is identical. This version of Danger Pod wiring will have:
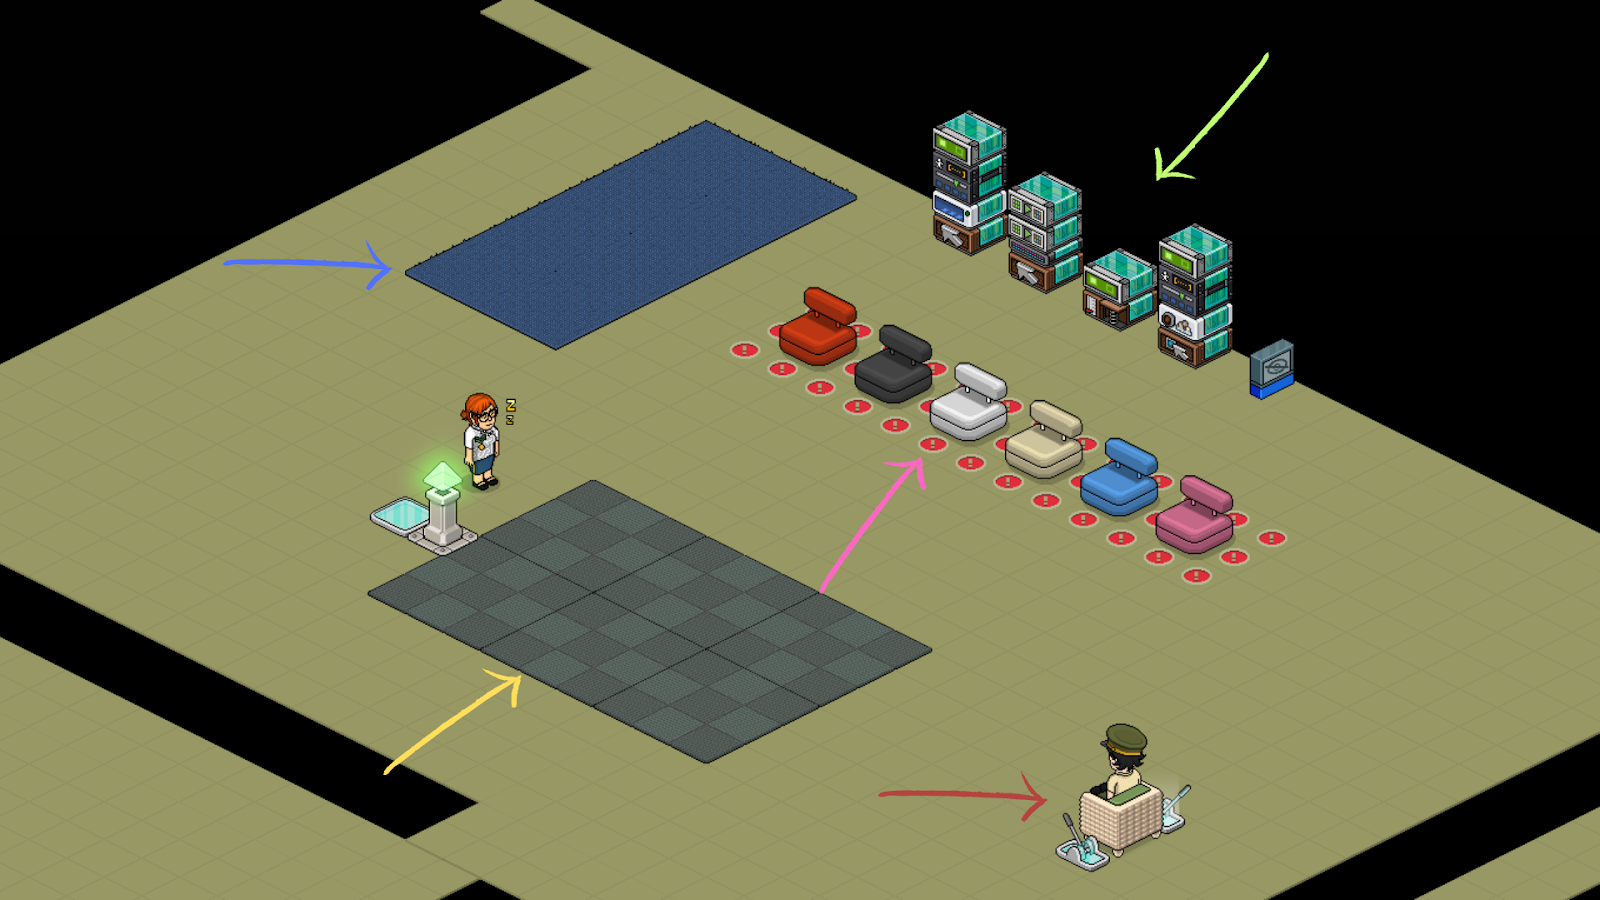
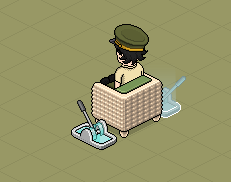
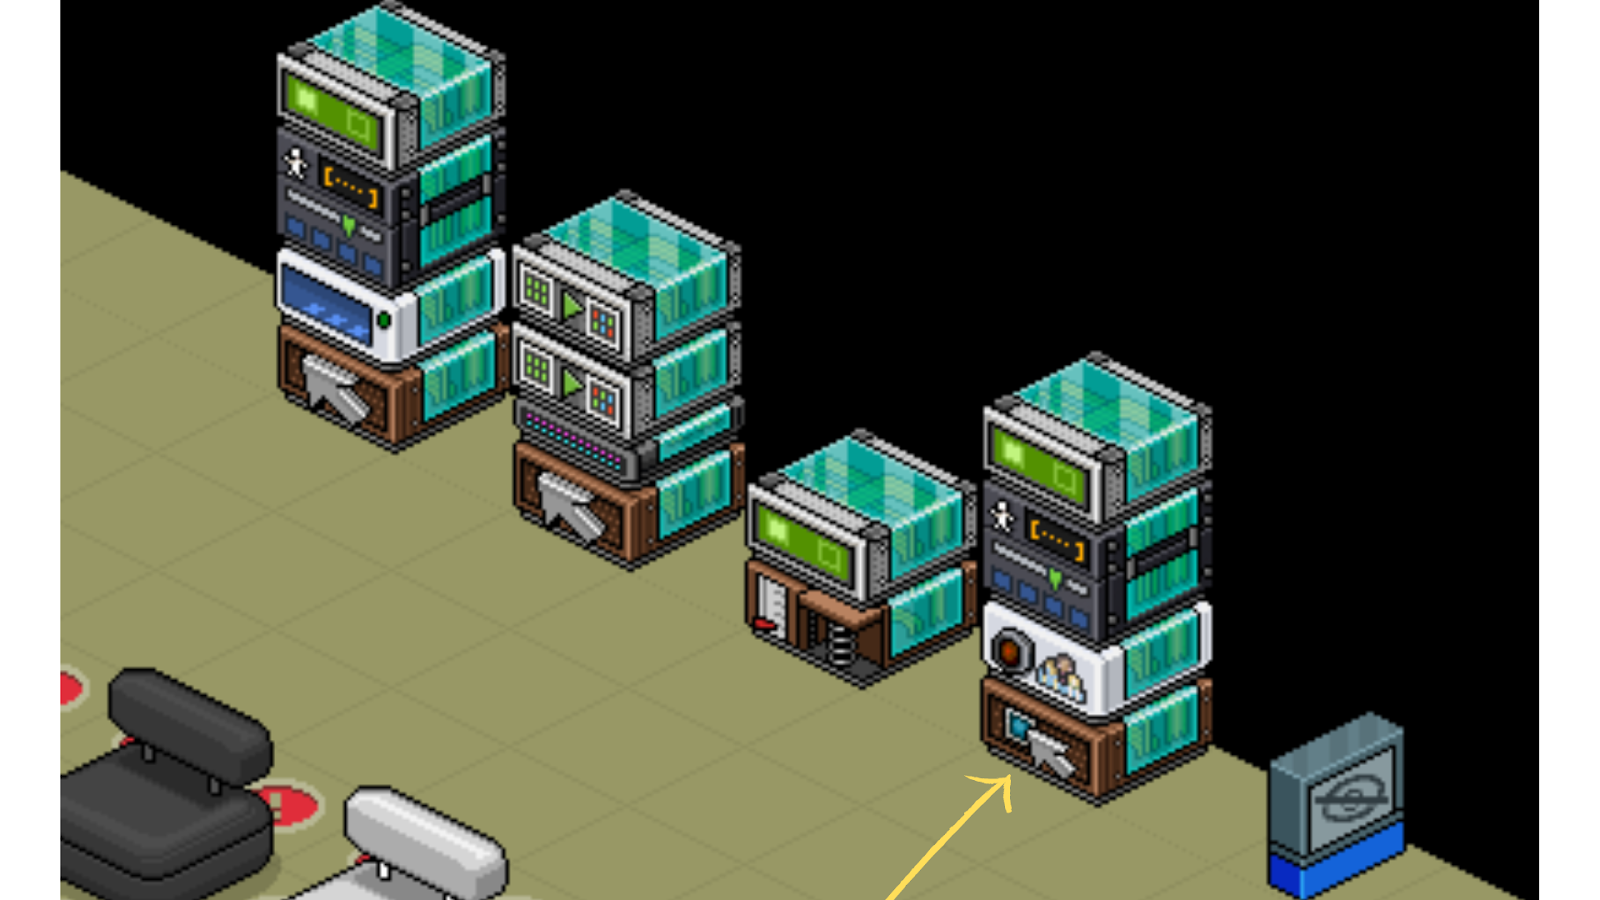
– a host area with the 2 switches on the sides of the host chair (red arrow)
– a game area with an entrance to the pressure plate through a gate (yellow arrow)
– an area where players who lost are teleported (light blue arrow)
– danger pods seats area isolated by invisible blocks (pink arrow)
– wired stacks (green arrow)
Each area should be isolated from other areas through either items Habbo players can not cross or walk on, invisible blocks, or anything you wish that helps the areas not to be reached from one to another by walking, to avoid confusion and prevent issues during the game. Players should be able to access the seats only through the Pressure Plate, and they should be able to access the Pressure Plate only from the game area through the gate. The wired stacks area does not have to be visible. I have made it visible to ensure it was easily accessible to you for this guide, but usually, they are placed on high-level floors by room builders.
Step 1

The first wired stack indicated by the green arrow will be the one that will gain players access to the Danger Pod chairs through the gate.
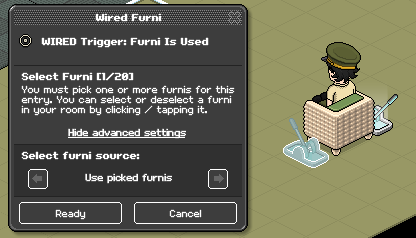
– Take one of the two Furni Is Used wired boxes and place it at the bottom of the stack.
– Double-click on the box and click on one of the 2 switches (I chose the one on the right of my chair) to select the furni that will trigger the effect (like shown in the first image below, on the left).
– The Wired settings panel should look as shown in the second image below, on the right, where Select Furni is 1/20 (the switch) and the advanced settings are selecting “Use picked furnis”. Click “Ready” once done.

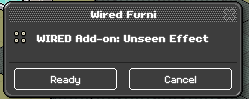
(OPTIONAL) The second piece of this stack will be a Wired Add On – Unseen Effect.
Take the Unseen Effect Add on, and place it on top of the Furni is Used Trigger box you have just set up.
This stack is optional as it simply allows you to close the gate even if a player is stepping right on the gate, bypassing the fact that usually a player on the gate would block its closure. There are no particular settings, although to set this Add on up you will need to double click on it, and then click on “Ready”, as shown in the picture below.
For the last section of this wired stack, you will place on top of the Unseen Effect Add On the two Wired Effects: Match Furni To Position And State. Double click the bottom Match Furni To Position And State when the gate is closed, select the gate as selected furni, and in the wired settings check “Current furni state” and ensure the advanced settings are set up to “Use picked furnis”. Click “Ready” once done.

Do the exact same with the top one, but with the gate open, as shown in the picture below:
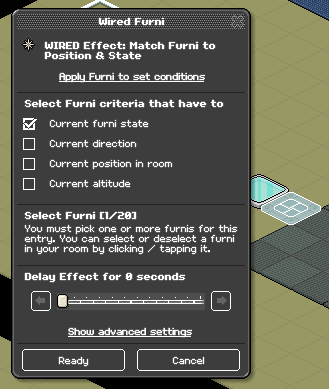
Click “Ready” once done.
Now, every time you use the right switch, the gate will close or open.
Step 2

The second wired stack you will need, indicated by the orange arrow, is very simple, and allows players to teleport to the Danger Pods by stepping on the Pressure Plate.
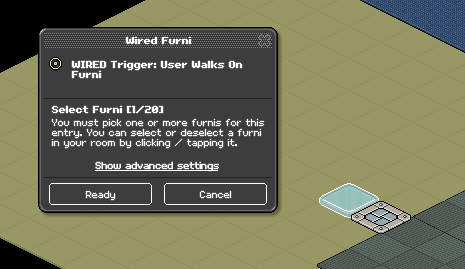
The first step to set it up is to take the Wired Trigger: User Walks On Furni wired box, double click on it, select the pressure plate, and press “Ready” as shown in the picture below.
The second step to set it up is to take a Wired Effect: Teleport To Furni wired, place it on top of the User Walks On Furni box, and when double-clicking to set it up, you simply make sure that all of the chairs are selected before clicking “Ready”.
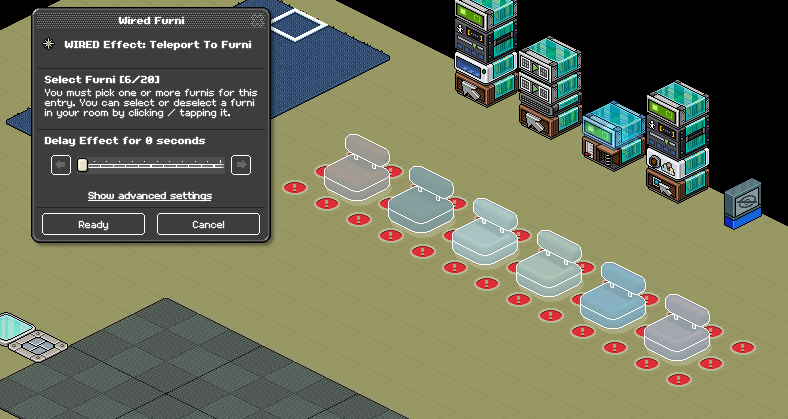
Now, when you open the gate for players, they will step on the pressure plate. They will then randomly teleport on the chairs.
Step 3
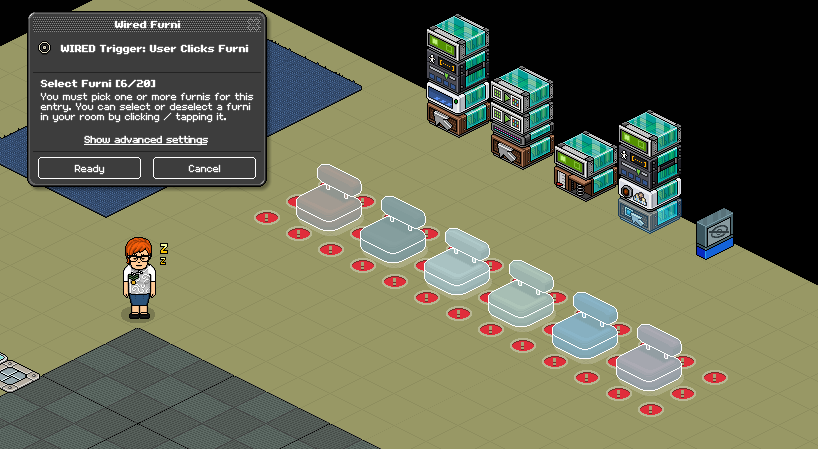
The next Wired Stack needed for this set up will be the one indicated by the yellow arrow in the picture below. This stack allows you, when a round finishes, to click on the Danger Pod chairs of the players who lost to teleport them directly to the area where they go if they lose. This system is efficient to avoid all the “please say !exit” clutter that happens with the Keyword system, or a bopping system where you may need to move objects.
First off, take the Wired Trigger: User Clicks On Furni, and place it at the bottom of the stack. All the setup needed for this box is to double-click on it, select all of the chairs, and click “Ready” as shown below.
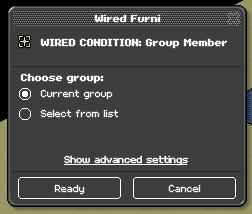
The second wired in the stack is a Wired Condition: Group Member. It is always good, if you are hosting a game, to create a group for that specific room to allow easier moderation and collaboration with trusted hosts and friends. In this case the Group Member Wired Condition, as a condition needed for the trigger to activate, allows only group members to action the trigger of the stack. This was necessary, otherwise any player in the room double clicking on the chairs would be able to send accidentally or who they wish to the losing area. The setup for this box is to simply select the group you want to give this permission to. I have set it up to “Current group” to apply it to the group associated with the room I am in, as shown in the picture below, but you can select any group you have. Click “Ready” once done.
Next in the stack you will need a Wired Selector: Users On Furni. For this box the setup is minimal as all you need to do is to ensure that the Advanced Settings have “Use Triggering Item” as set up, as shown below and click “Ready” once done.

For the last Wired box in this stack, we will take another Wired Effects: Teleport to Furni box and we will place it on top of the stack. The setup will allow you to teleport people who lose to the losing area. Double click on the wired box and you should select the floor on the losing area as furni selected. Make sure the Advanced Settings are set to Furni Source: Use picked furnis and Users source: Use users from selector.

Step 4
When hosting, once you have teleported people who lost to their designated area, the last wired stack will allow you to simultaneously teleport all players who had not lost and are still in game back to the game area to get them ready for the next round, by flicking the other switch next to your host seat.
Take the Wired Trigger: Furni Is Used that is left from the furni list. The same as with the switch on the right of your seat, you will double click on the wired box, select the other switch and ensure that the Advanced Settings are set to “Use picked furnis” before clicking “Ready”.
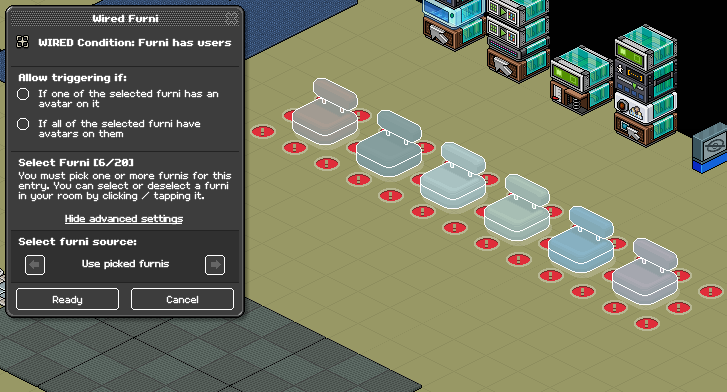
For the second wired on this stack, take the Wired Condition: Furni Has Users box, double click on it, and set it up as follows:
– select all of the Danger Pod chairs
– make sure “Use picked furnis” is selected in Advanced settings, then click “Ready”
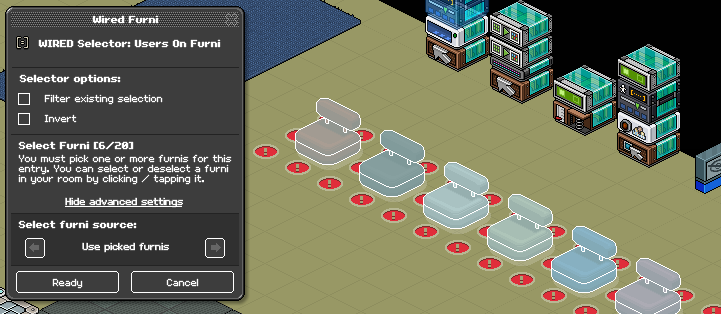
You will now need the other selector in the furnis list, and set it up by double clicking on the box, but this time selecting all of the chairs, and making sure that “Use picked furnis” is selected for the advanced settings, as shown in the picture below, before clicking “Ready”.
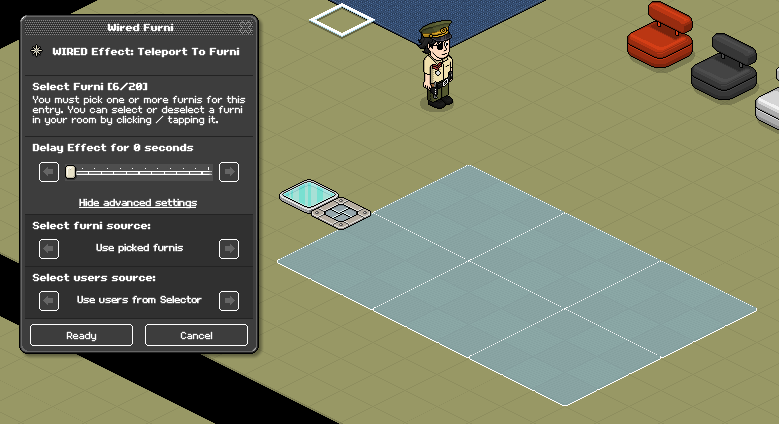
Last, you will need to place a Wired Effect: Teleport To Furni in order to tell the stack where it should teleport your players. In this case, you will click on the box, and for the settings you will select the game area floor as Select Furni, and in the Advanced Settings make sure that “Use picked furnis” and “Use users from Selector” are selected in the options.
Now every time a round is over and you have cleared up who lost, all remaining players in the game will be teleported to the game area when you flick the left switch.
Step 5
(OPTIONAL) Last, the item indicated by the bright blue arrow, is an Invisible furni controller. This furni allows to hide the invisible blocks I have placed around the chairs to ensure that once everyone gets one their chair there is no risk they switch chairs accidentally (or even willingly), preventing incidents and/or cheating. This is optional as you can output the same results by blocking the chairs through other furnis, but I thought it was a cool feature to talk about regardless.

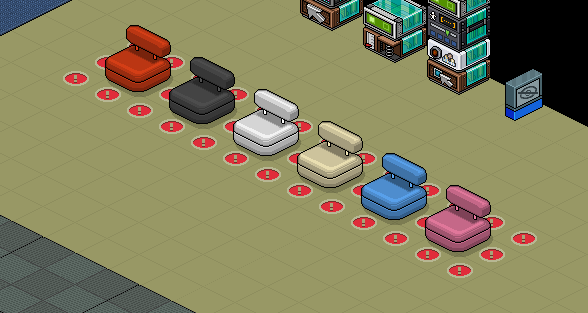
When the invisible furni controller is not toggled, it lets you see where the invisible blocks are, as it show below:
When toggled, the invisible blocks will be indeed… invisible. Creating a barrier between and around the chairs that can not be seen and that will not allow players to move off them until the host moves them through the other actions in the previous steps, as displayed in the picture below.

Now, you know how to set up a Danger Pod area using the new Wireds at your disposal from the most recent updates, as well as making the game management extremely easy and practical. I hope you liked this guide, if you wish, follow us and take a look at the other guides you see on the site!